Jason Wollmuth, M.D., reviews a multivessel, high-risk PCI referral case involving Impella support via axillary single access and single operator rotational atherectomy.
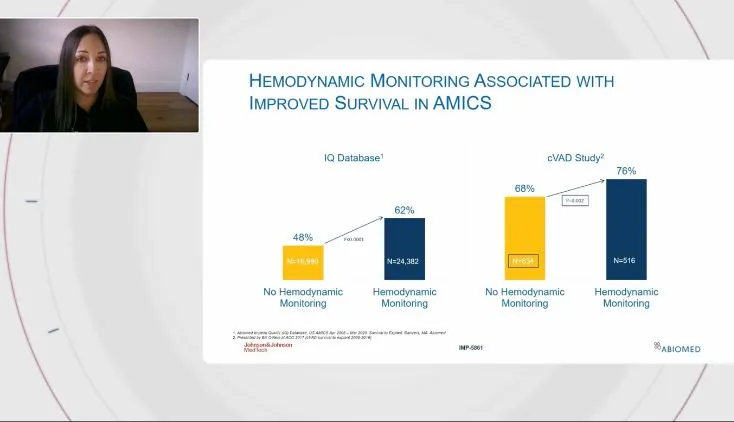
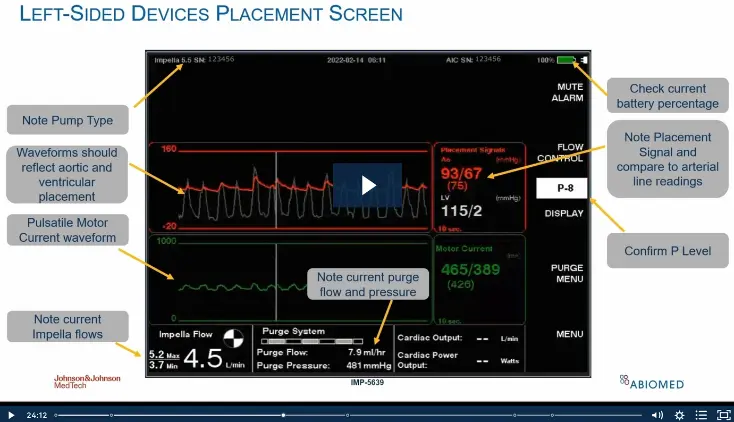
In this critical care transport webinar, Jena Billig discusses pulmonary artery catheter monitoring and how to understand hemodynamic values when transporting patients supported with Impella.
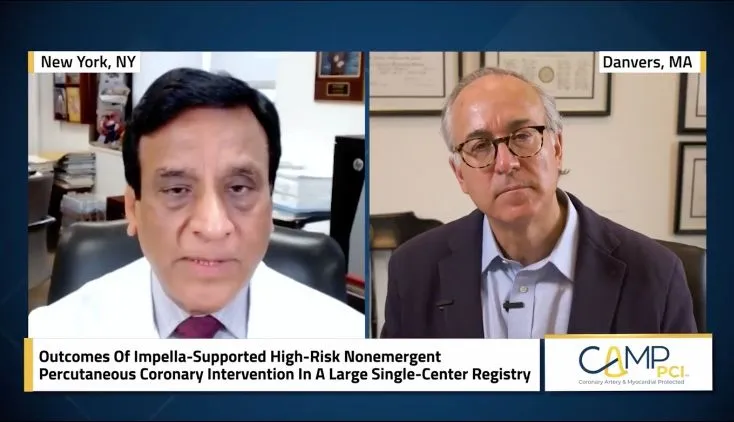
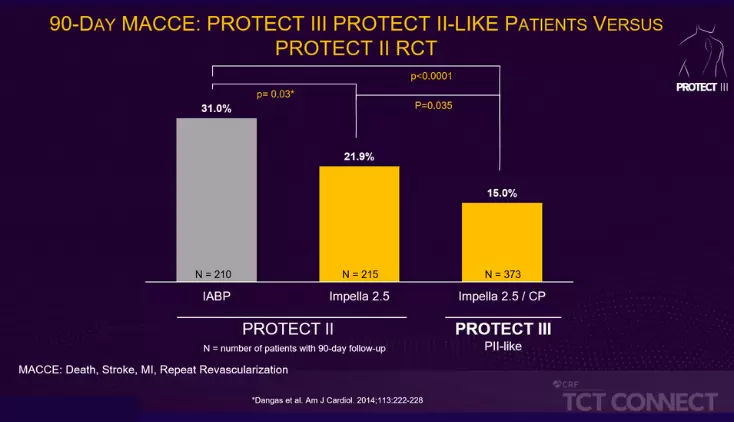
This FAQ discusses the PROTECT series of FDA clinical studies, which includes PROTECT I, the PROTECT II RCT and PROTECT III, is the largest-ever study of hemodynamically supported high-risk PCI patients.
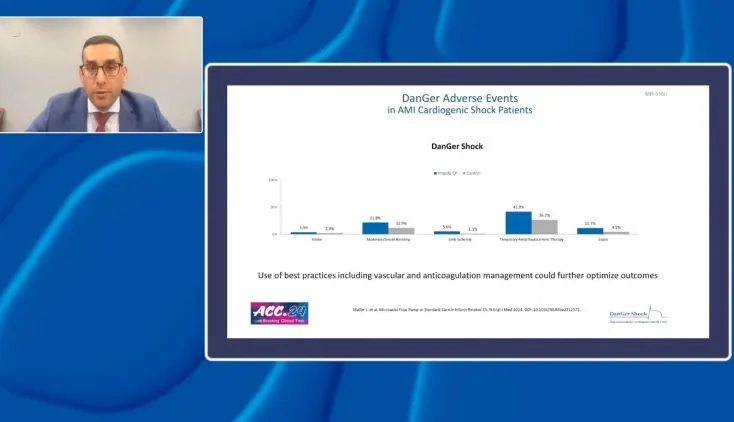
Mitul Patel, M.D., Alexander Truesdell, M.D. and Katherine Kunkel, M.D., discuss the implications of the DanGer Shock RCT for community and academic centers.
Jena Billig discusses heparin-free purge solution and the features of the second-generation Impella 5.5® with SmartAssist® in this critical care transport webinar.
NPS-1674
This information is intended for use by customers, patients, and healthcare professionals in [region] only. We recognize that the Internet is a global communications medium; however, laws, regulatory requirements, and product information for medical products can vary from country to country. The product information included here may not be appropriate for use outside [region], and the information from other sites you visit may not be appropriate for use in [region].
The Protected PCI community
is now on HeartRecovery.com
Providing education and training to help health care professionals
recover hearts, oxygenate the body and save lives.